
Painted the white IKEA bookshelves, so they were a little more "quiet" in our library. This required buying a special primer that works on laminate finishes, then sanding everything, then painting. It seemed like it took *forever* but I was pleased with the result and have never regretted spending the time to "upgrade" these shelves. The plan is to ultimately get nicer shelves, but now there is no reason to rush!


*****
Spray-painted the otherwise lovely flower pots the previous owners left on the front patio. I had seen what they were supposed to look like in a magazine, and understood that they had passed their prime in their current color. I bought some good ol' Rust-oleum spray paint and went with simple black. I was SO happy with the end result, such a statement! And the color really makes the color of the flowers I planted pop, too!


*****
I also made a growth chart for the kiddos. I had some old plywood, stain and clear lacquer from the previous owners, and I purchased some black acrylic paint and stencils. I was very pleased with the end result!


*****
I painted an accent wall in Samantha's room. Her room had been a source of decorating frustration for me because I wanted it to have something "special" and because I had been unable to match the paint color from the paint the previous owners had left. There were large holes in her wall that had been patched, but remained bright white and obviously unfinished. I did my best to use some very creative picture hanging to cover what I could, and I had previously made her a canopy, then added a mobile in an attempt to distract from the patched spots. I later revised the mobile to be much nicer than the original. I can now say that I'm pretty happy with her room and I don't plan on doing much else to it until she moves to a bigger bed.
Making the monogrammed picture:
The original picture

Scrapbook paper and a home-made stencil

The completed project

Supplies for the canopy and making the original mobile:


The original canopy, without mobile (you can *just* see the patched holes in the walls, they were very obvious in person).

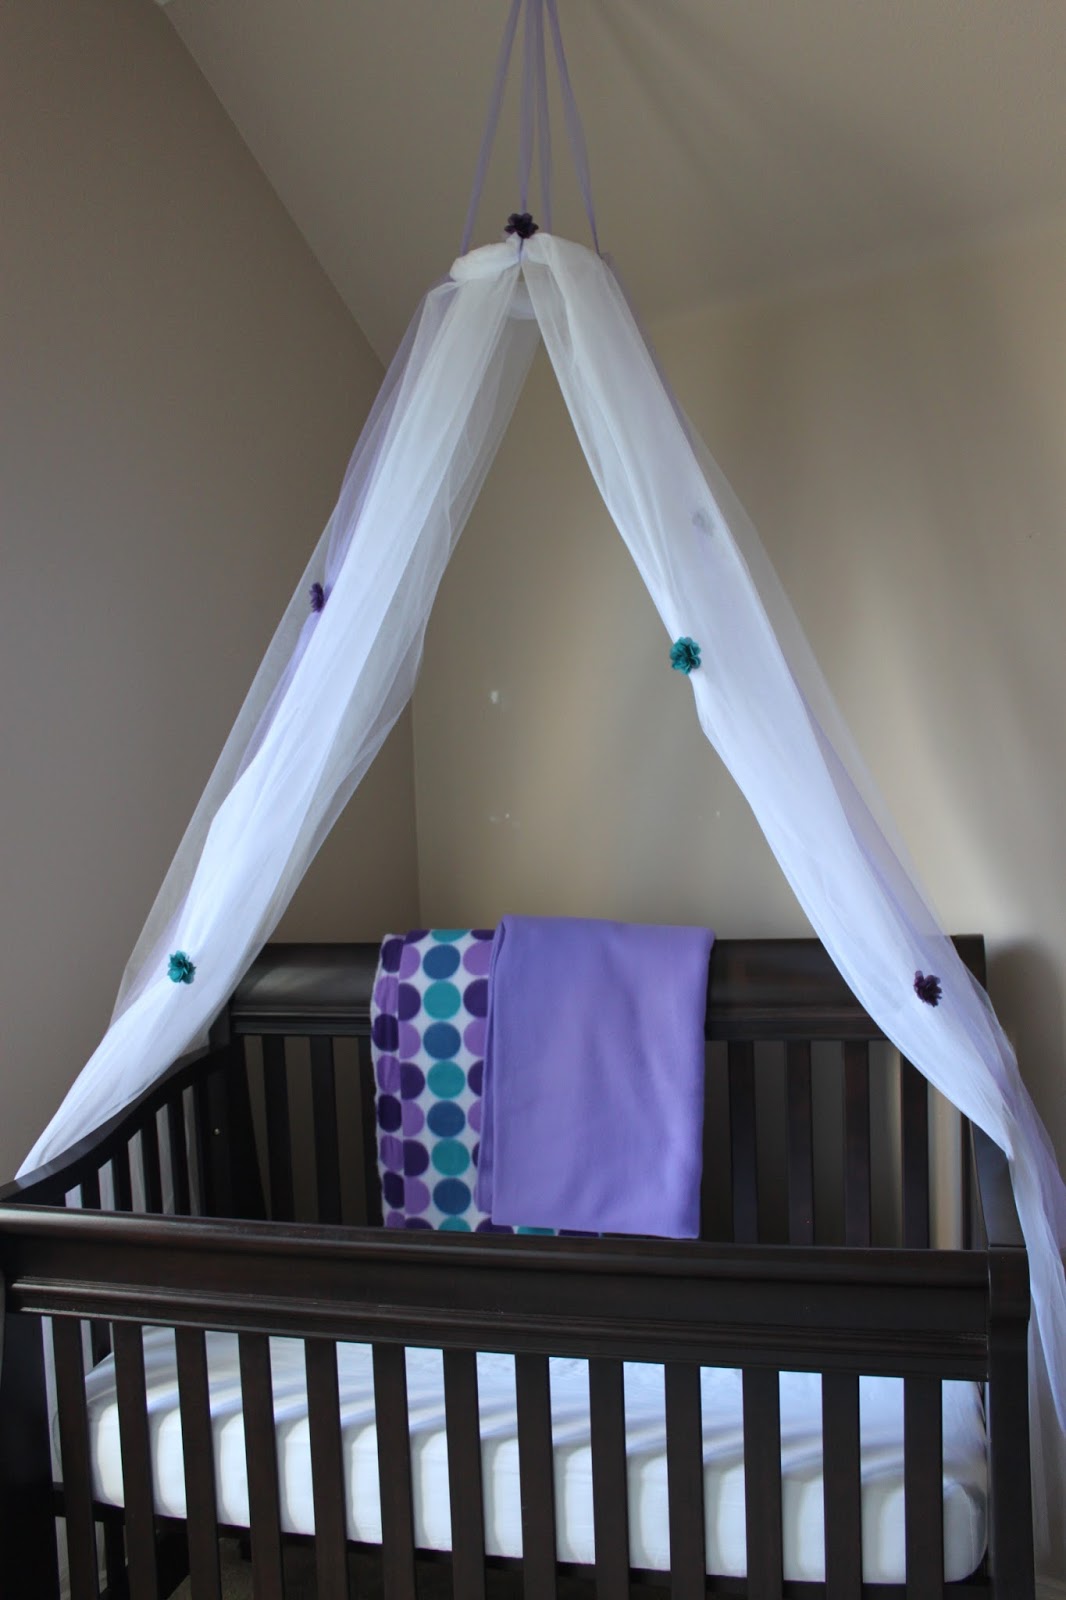
Added the mobile -- I had tried to repurpose some materials and make some stars into flowers, but I was never very satisfied with the result.

Finally, a completed canopy with hooks to keep Sam from pulling it into her crib. Also, note the much nicer flower balls (what else would you call those things?) instead of the cheap-looking mobile. And you can see my "creative picture hanging" to cover up the spots on the wall.

Noah and Sam get ready to help me paint.


The first color I picked was way to bright, you can see them both here:

Done painting!

The completed look:


Her mirror that we used for 1 year pics and the ribbon I made to hold all her hair clips.

*****
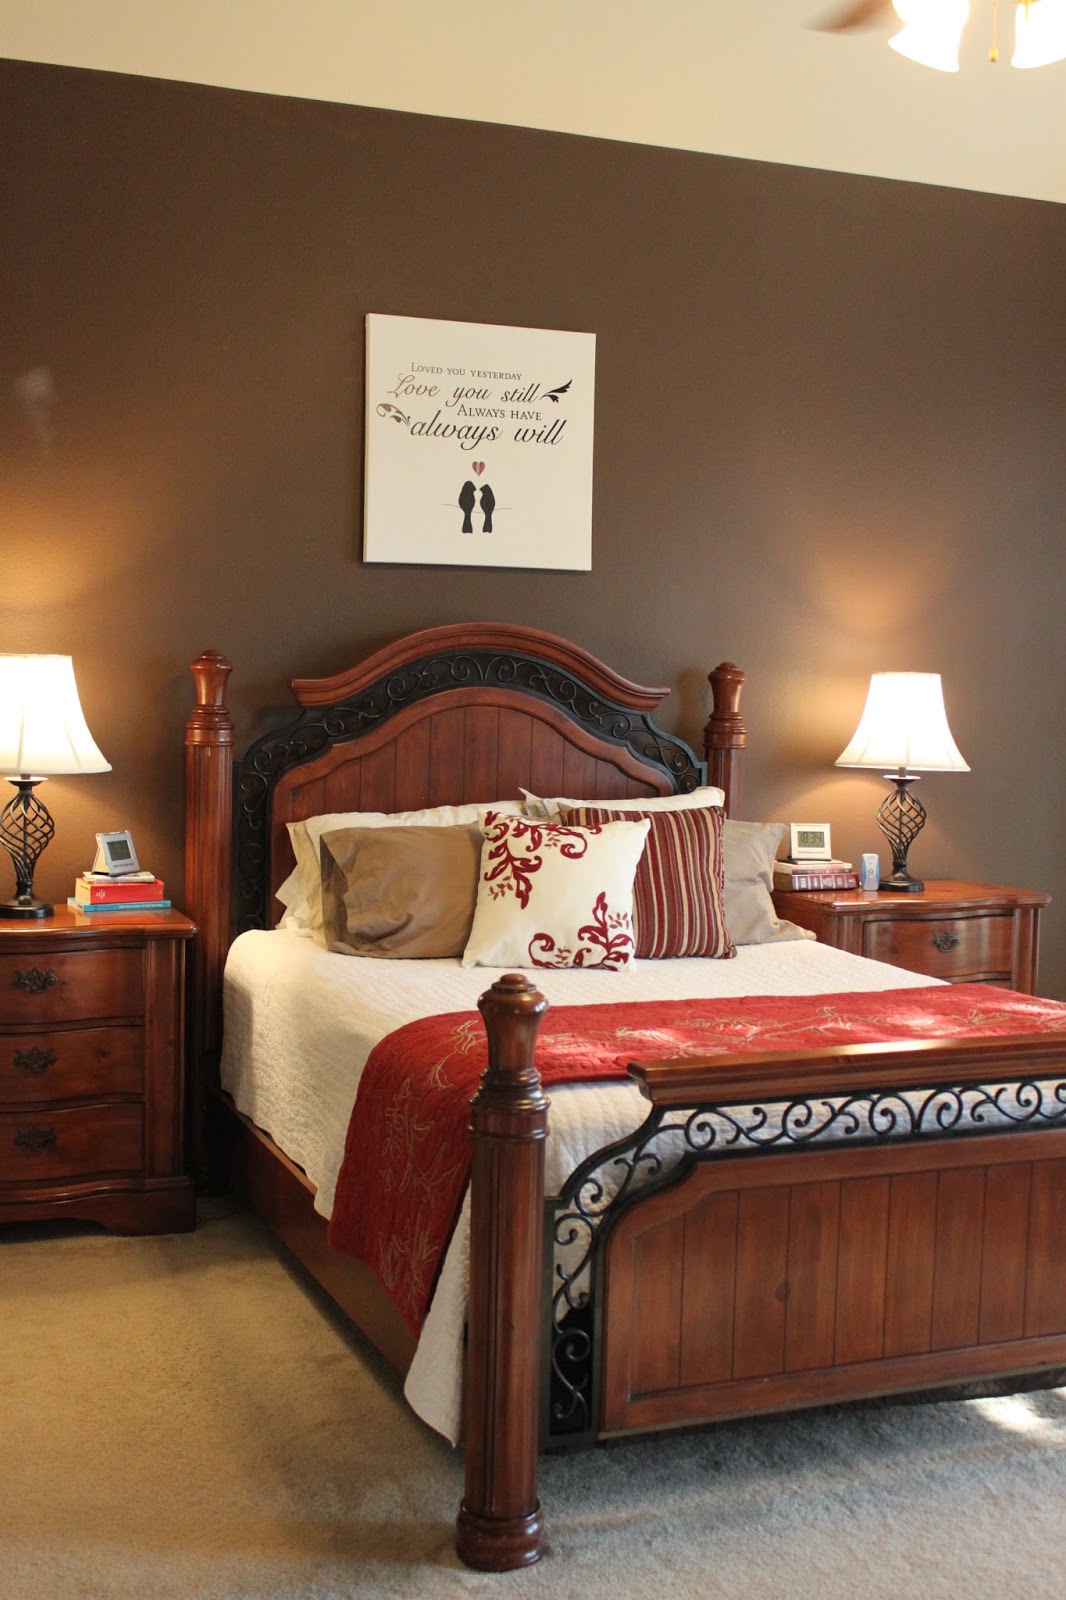
I also repainted our room this past week. It had looked so nice when we walked through the house before we purchased it, but that was with the previous owners' furniture, bedding, and decorations. With the things I have picked out the walls appeared very orange, and I can't say I was a fan of the purple valances with striped curtains -- although I could tell they were custom ordered and I felt that I *should* like them. I had also run into the same problem I had with Sam's room -- large patched holes on the walls with no way to match the paint. I debated for *weeks* over which paint color to go with and solicited advice from decorator friends, family, and friends who I just plain trust. I eventually ended up going with a chocolate brown color that I feared might be too dark or that might appear purple-ish, but I committed because it seemed nice "enough" and I was ready to be done with the decision. It also helped that my good friend Kelley was willing to give up her Labor Day to help me do the painting while Matt watched the kids, so I had to commit to *something.* As we started painting, I realized I actually did love the color, and by the time we were done I was ecstatic! The room looks so much nicer, and seems more calm, more inviting, and much more "us" (Matt and I).
Before:

Noah helping

In progress


After!
*****
The other part of the bedroom re-do was to transfer my vinyl stencil from the wall onto a canvas so I wouldn't have to worry about moving it again, and because I didn't want to get rid of it. The smart thing to do, I've decided, is to apply the vinyl decals to a glass frame, or a canvas instead of directly to the wall, if you ever think you might move them. Why didn't I think of that in the first place?! Anyway, I didn't want to spend any more money so I took a canvas picture that I had removed from Sam's room (that I had only ever partially liked) and primed it with the same stuff I used on the IKEA bookshelves. After that I invested in some white spray paint and painted the canvas before painstakingly transferring each vinyl letter onto the canvas. It was easy enough to remove and transfer them, the tricky part was making sure they were straight/level on the canvas. I had some space left at the bottom of the canvas, so I created a stencil for two love birds and stenciled, then painted them on. The last touch was a small red heart (to tie into the bedroom colors), that I ended up cutting out of scrapbook paper and mod-podging above the birds. I am happy with the end result.
The original canvas

The completed look

*****
In addition to painting, I've done a fair share of organizing:
The third garage.
Before:


After:


Sam's closet.
Before:

After:


No comments:
Post a Comment